Using XBackbone custom domain uploader and Flameshot on Linux
During my migration to Linux, the absence of ShareX bugged me. Using Flameshot I found a workaround to enable a custom self-hosted…
Using XBackbone custom uploader and Flameshot on Linux
Recently, I’ve started migrating more and more of my Windows workflows to Linux. One thing that was always bugging me was that there seemed to be no adequate alternative to ShareX with a self-hosted backend. ShareX is a great screenshot application for Windows with many features also including video recording, file upload, URL shortening, …
One thing I always found great about ShareX was that you could easily self-host a server that manages your uploaded images. This was at the time when puush.me, which I used before that, stopped accepting registrations (currently still running, surprisingly). As it was inevitable that the service would shut down at some time, I used the remaining time to search for a replacement, optimally one which I could host myself to keep the data off the cloud. A while ago I created an incredibly simple custom server with a friend that had no web interface. After a while of running that and not being motivated enough to implement an interface for user management and so on, I searched around for an existing solution.
In the end, I decided on XBackbone because it offered everything I needed, which wasn’t that much at all apart from a simple user as well as file management, and was relatively simple to set up.
XBackbone Linux Script
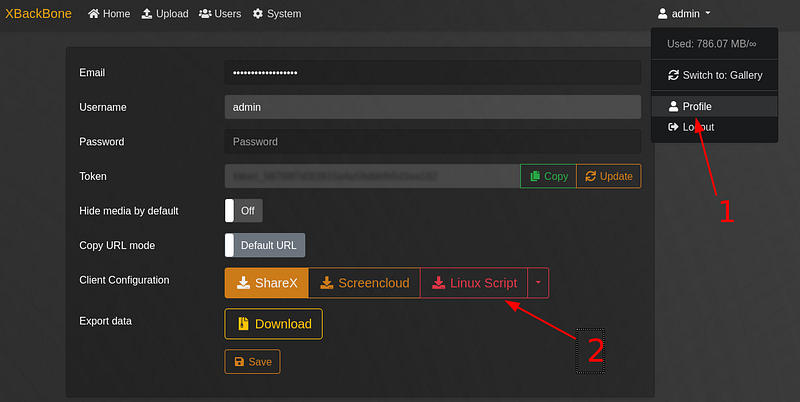
As I recently found out, after again being frustrated by having to upload screenshots manually, XBackbone offers a Linux script you can download from your account page. This script then takes a single file as an argument which it can upload. This is already very practical to use from the CLI and will definitely be helpful for me in the future.
Another option this script offers is an integration to the desktop, basically it creates an application shortcut that does the same thing.
Installation Instructions
The installation is simple and worked flawlessly on my Ubuntu-based system. I will show the installation using screenshots, we only need to open the CLI once. First download the script:
Subsequently, we need to install the application. To accomplish that, open your terminal of choice and go to your download folder, then execute the following command (your script name might, of course, be slightly different):
sudo ./xbackbone_uploader_admin.sh -desktop-entryHere it is important to execute this as root (sudo) as the installation won’t work otherwise. Even if it would theoretically work for your setup, the script will refuse this.
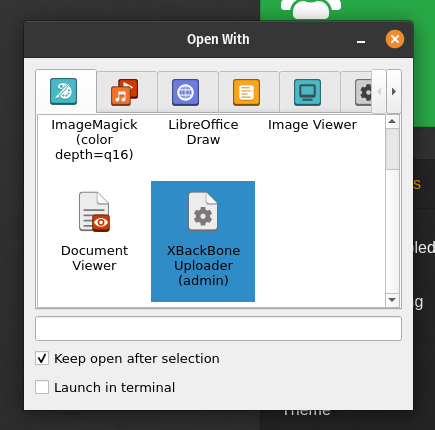
Now we are ready! Take a screenshot and click the option Choose an app to open the capture (Ctrl+O)
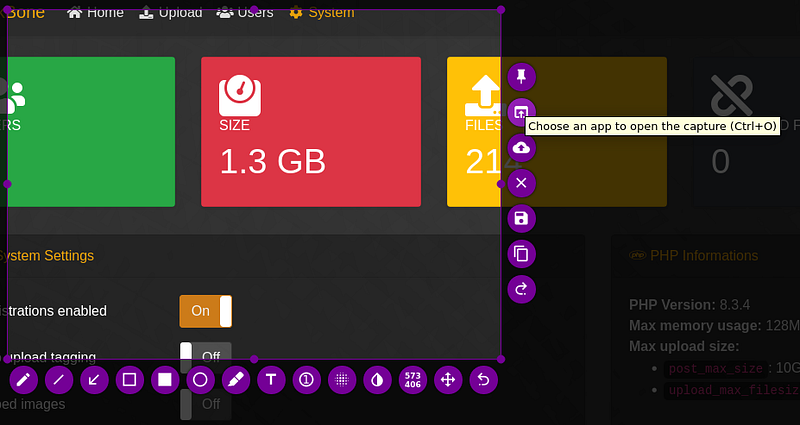
Thereafter, a window will pop up where you can select the option to open the XBackbone Uploader. Simply click this and your screenshot will be uploaded. Afterward, a notification will appear (at least in PopOS it works properly, your mileage may vary from my experience) with the URL. In addition to that, the link will automatically be copied to the clipboard.

Are there better options?
For some reason, I’m not quite pleased with this workaround, to be honest. It works better than what I had before and is automatic enough, but still not perfect. I would like to have it work as in ShareX where the capture is uploaded without any additional input, but the Flameshot team ignored this request from multiple users over the years, so this will likely never happen. (See Issue #3467, Issue 2483, Issue 178)
Do you know of any better options? Please reach out to me, I would be truly grateful. For now, this works though, Ksnip didn’t work either, I never got an error even if nothing happened… If I eventually figure out a better way to do this, I will surely write another article and append a link here.
Hopefully, I was able to help some of you that potentially face the same problem.